Research Phase (500 Words)
I started out this assignment by conducting further research. I organised this into various sections which I placed into a Figma file for a higher efficiency. The subjects that I researched and created small mood boards for are: Image Tracking Examples, Exporting 3D Models, Gravity Sketch Process, Colour Palettes, Headphones Advertisements / Store Displays. This is to help reinforce my headphone and display designs. I started with my priority of researching Gravity Sketch and how it is being currently used, looking at YouTube videos and various examples online I gathered a few examples of the process of modelling inside Gravity Sketch. This is to provide an example of the process but also so I can look back at the process whilst creating my own model inside of the program, these examples are headphones, a shoe, and two variations of cars. This shows a wide range of capability inside of Gravity Sketch.
The next part I looked into is Image Tracking examples, This is to provide various ways in which Image Tracking is used in the world, such as on pizza boxes or on posters. This section is used to keep me reminded of successful ways of image tracking and how I can accomplish that inside of 8thwall. This also gives me further ideas of how Image Tracking can be integrated into graphic design as a piece of emerging technology. As the majority of individuals carry their phone around them every day, Image Targets could be plastered everywhere to further enhance advertisements, merch or products. An example of this again is 19crimes with the animated packaging once scanned, however this can be expanded upon further by applying it to clothing by applying a large QR code on the back which will cause audio or an animation to play instead of just a link to a website.
Next I finally looked into various headphone advertisements but more specifically store displays, as I wanted users to be able to see the 3D model of the headphones in store after scanning the display. This also helped me with various design inspiration for my illustrator made display board. I also put inside some various colour palettes based on Retro advertisements for headphones or similar devices on a Pinterest board.
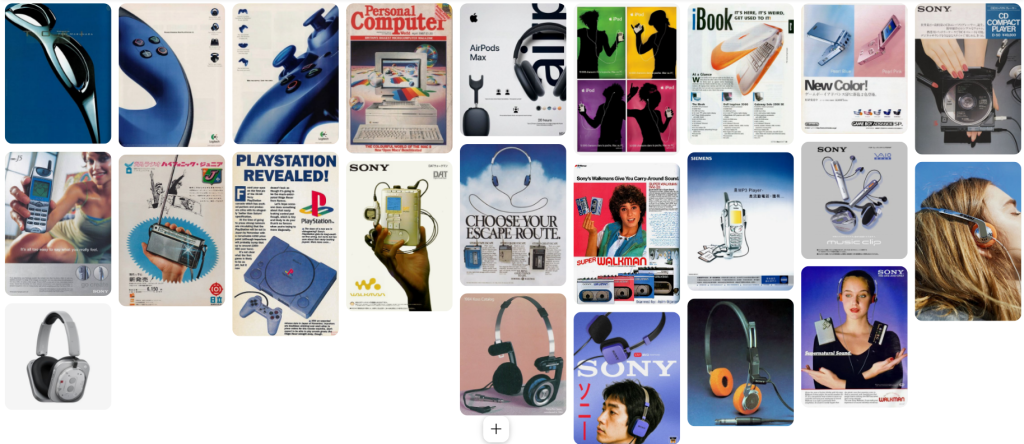
I accidentally ran into a retro Walkman advertisement while looking for display boards on Pinterest. This old style has inspired me to not do regular looking headphones and branch out, this is due to most headphones these days have a similar shape and style, only really varying in hardware. However “retro” / older headphones can be seen with more unique or visually pleasing designs. I looked into newer headphones that had a retro look and found the “Nothing” headphones.
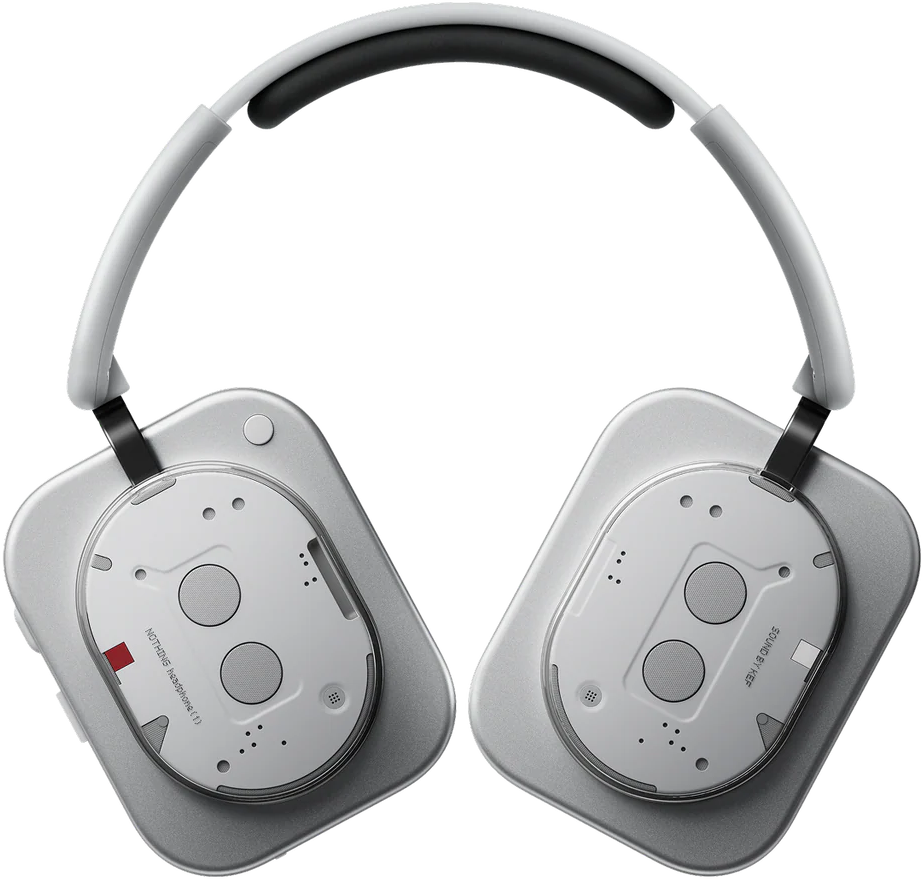
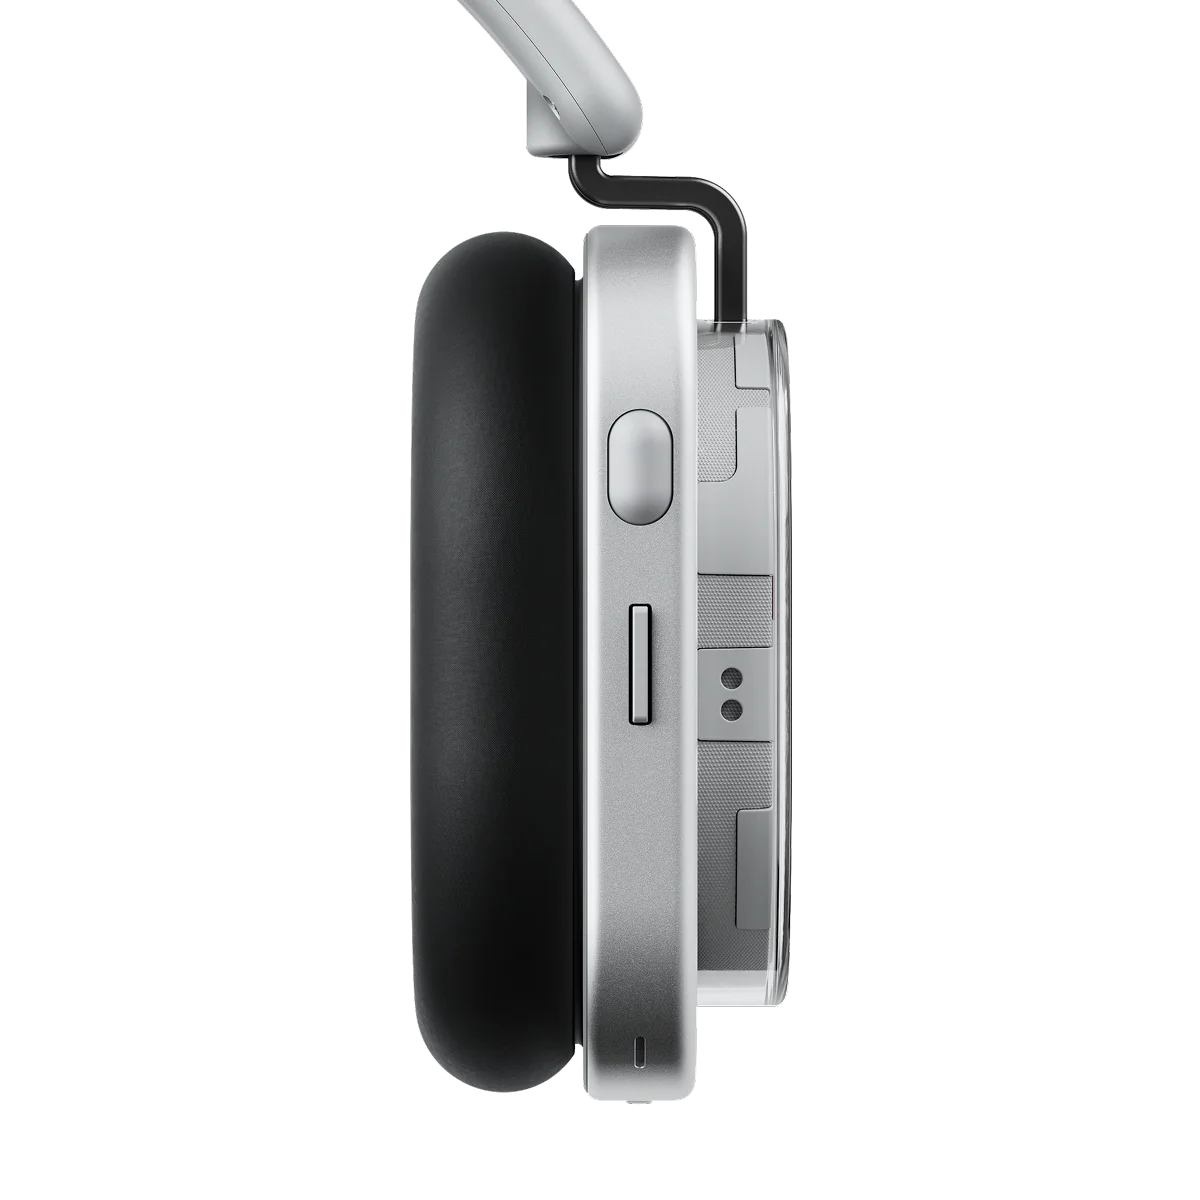
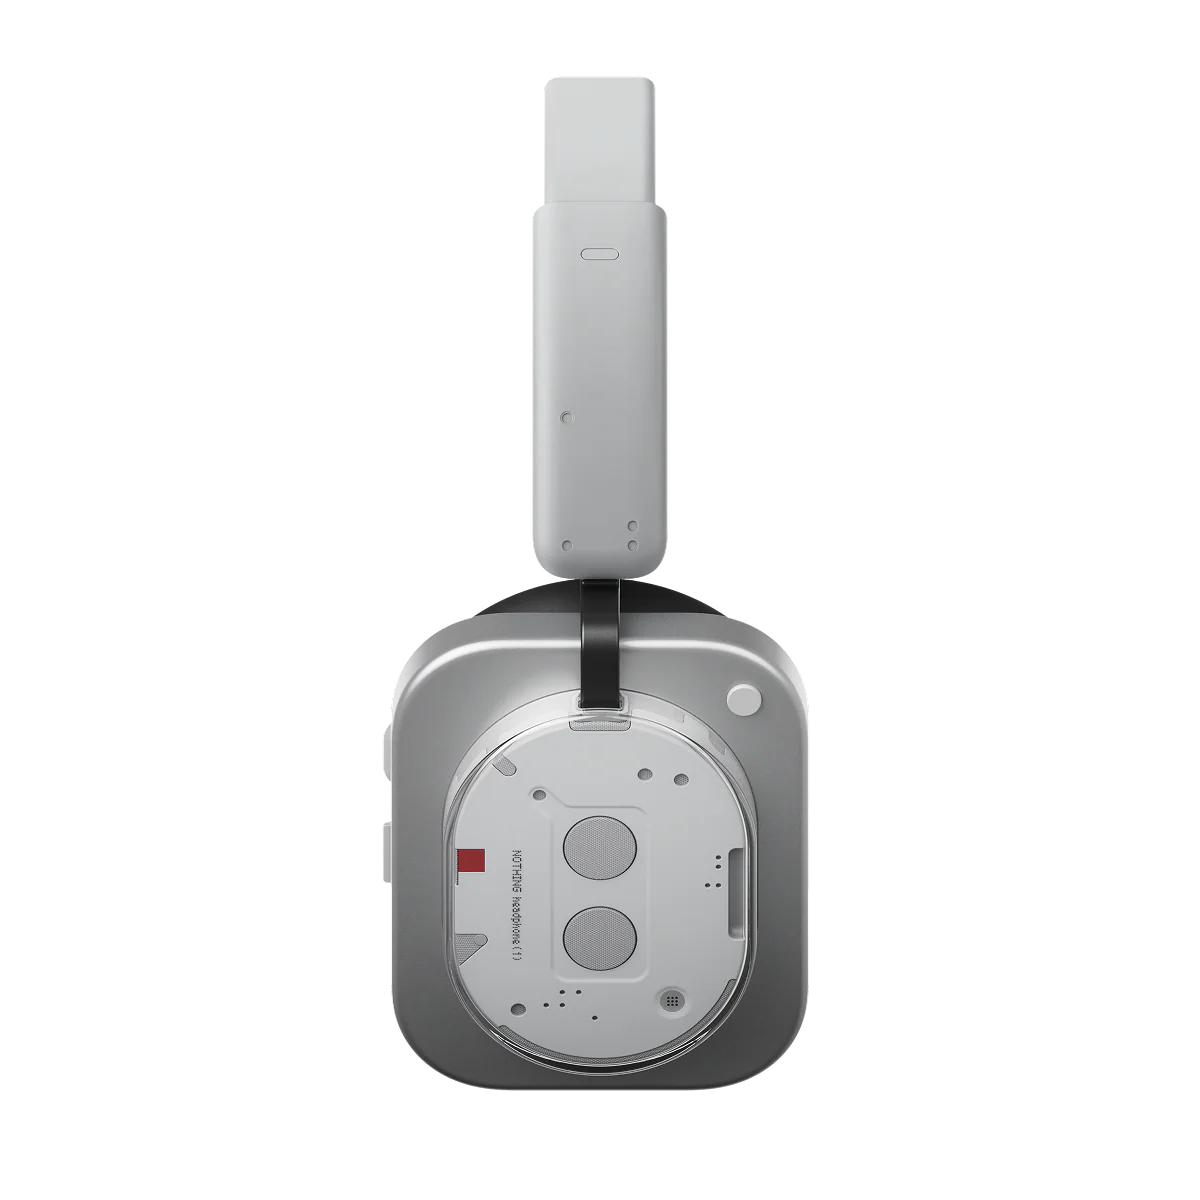
These headphones feature a semi-transparent design revealing internal components similar to retro devices such as semi-transparent Gameboys. This unique shape of the earphone area has inspired me to have a more unique design when it comes to designing my headphones. Below are images of the key parts of the headphones from various angles. I can use these as reference images as I work inside of Gravity Sketch.
Assignment Objectives:
Exhibit forward-thinking by integrating emerging technology trends and concepts into the work.
Apply research-driven idea generation to develop a production piece related to emerging technologies.
Demonstrate effective project management skills in the creation of the production piece and the compilation of a portfolio.
Showcase software proficiency by incorporating appropriate tools and techniques in the production process.
Incorporate ethical values and principles in the production piece and portfolio.
Gravity Sketch (500 Words)
To kickstart the project I began using gravity sketch and following the built-in tutorial that demonstrated the uses of the various pen tools and setups within Gravity Sketch. This helped me understand the fundamental workings of the program and helped me navigate between various tools and shortcuts to create a more effective workflow. This tutorial also showed me how to use the mirror axis setting, which mirrors everything I use, this is key into having perfect symmetry across all designs, especially in ones such as headphones.
After messing around and getting comfortable using the program inside of the VR space, I started creating some wireframe variations of headphones. I uploaded a Gravity Sketch Head asset to draw against to get an accurate size on the headphones model. I used a black thinner brush to emulate that “sketchy” feel on the headphones. I repeated this a few times whilst looking back at my research to draw a few variations of headphone models. This was my first step instead of beginning with the display boards as I wanted to have my model ready to use for when I started creating the display boards.
I used the VR headset recording feature to show off the process of creating one of the headsets whilst also showing my other idea variations, this is to showcase the VR as a potentially effective tool for graphic designers to use to show off mock-ups to clients. This also touches into an ethical issue as people with disabilities or impaired vision may not feel comfortable within a VR headset, which is why there is a cast mode to cast the view onto a screen, making this accessible for everyone.
Here is a video showing the various headphones styles I’ve created so far, ranging from basic looking headphones to more obscure or unique designs inspired by the retro advertisements I found and added onto my Pinterest board. In the video you can see me using the mirror mode to have symmetry on both sides while using the head asset which is certified to be an accurate average sized head meaning my headphones would be an accurate size if 3D printed or used as a face filter.
However during this process I realised a method to show anchor points after a life is drawn. This allows for more control of lines post drawing and allows for a smoother and more precise control over wireframes. This helps create more refined sketches inside of Gravity Sketch to allow for a more clearer picture for the viewer.
This is my refined attempt using the anchor point to create a proper wireframe, this process shows me drawing general lines whilst looking at a previous wireframe attempt that I did.
However during this process I realised there is an easier and more efficient way to create these headphones, this is through the use of shapes. You can put down shapes instead of drawing with the pen tool in Gravity Sketch, however I found in advanced settings that I can also subdivide certain shapes just as you do in Blender. As this gave me familiarity as I used this process in Blender before I chose this as the way to go ahead, in the video you can see a timelapse of the process start to finish as I did not think this would be one of my final outcomes since this process started off as experimentation.
Below are further links to videos I recorded during the use of Gravity Sketch that show various stages of development or experimentation.
Adobe (500 Words)
My next step in this project was to create the display board, this was going to be based off of my conducted research inside of my Figma mind map but also my Pinterest board for this project, as both have had a large influence on how to create a display board that’s eye-catching but not overwhelming with information. I initially started with Adobe InDesign to help map out my design using the a four column grid.
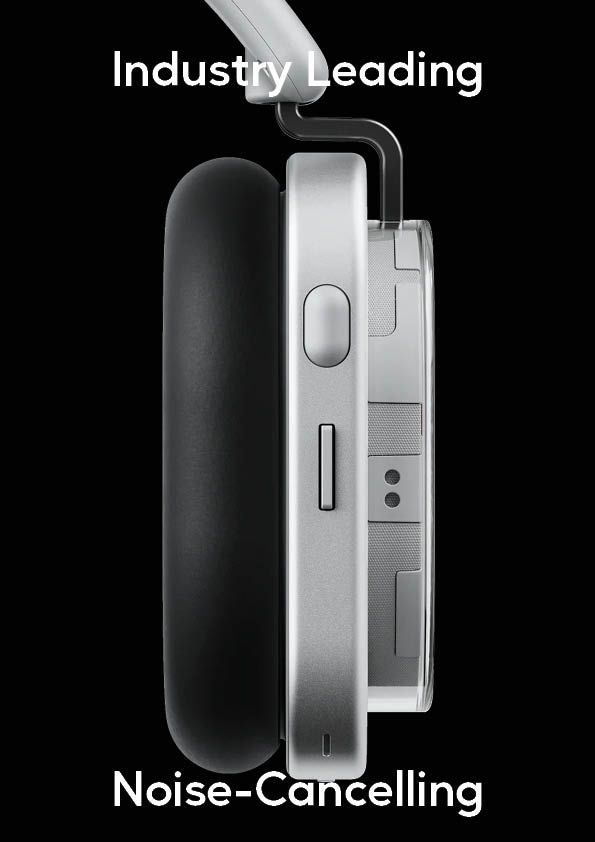
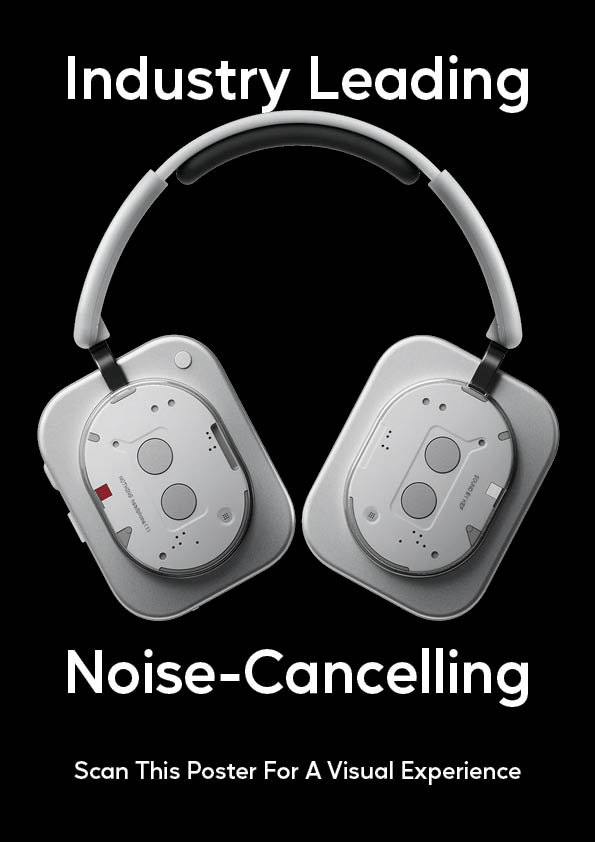
My first two attempts used the “Nothing” headphones as I had issues exporting my headphones at the time, this was a basic general idea design that is an experiment with layout rather than an aesthetically pleasing design. These designs focus on the hierarchy of promoting the selling point of the headphones, the “industry leading noise-cancelling” then the poster scanning underneath.
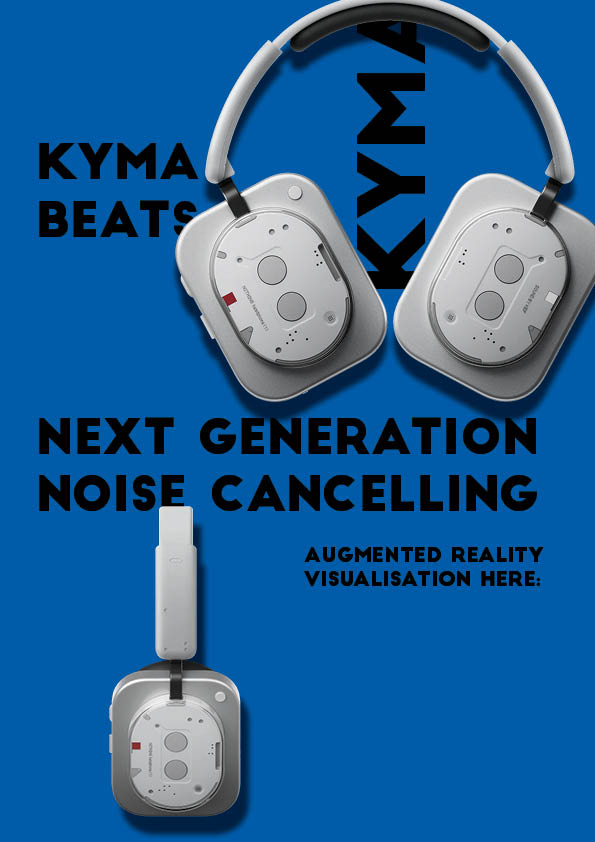
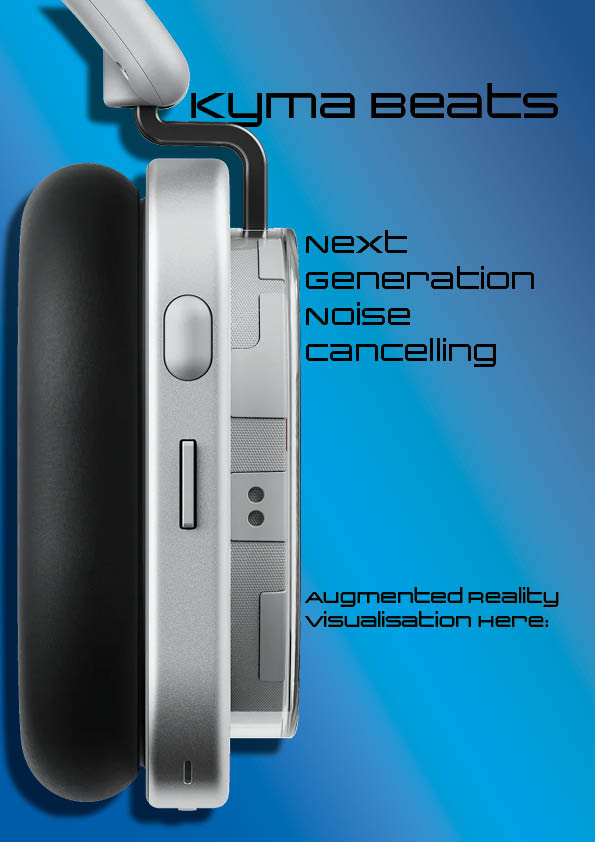
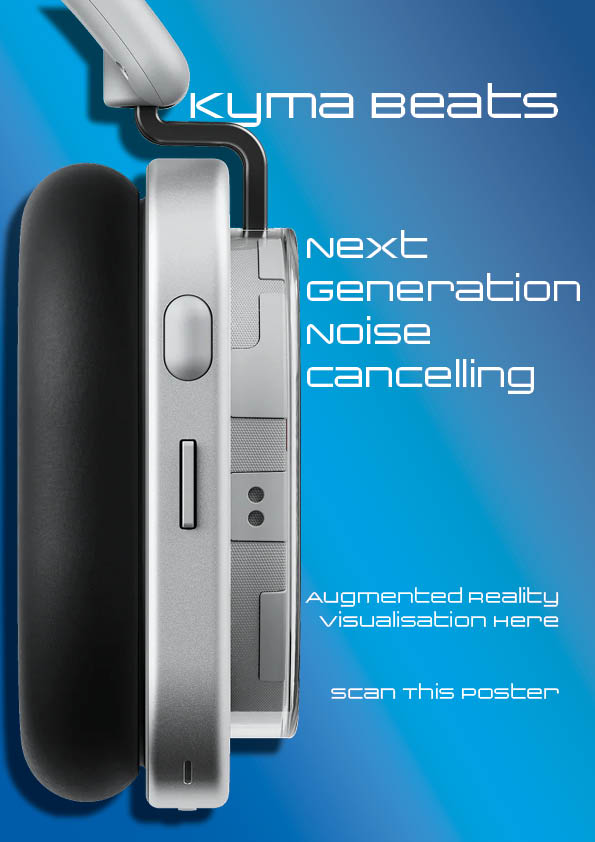
Next I decided to experiment more with the layout by including two images of the headphones model showcasing both sides of it, with text surrounding it. However I decided this was too busy with the repeated company name and various text, I left space in the bottom right for the QR code. I also included a different coloured background to create a more eye-catching display board instead of just a plain black background with white text. My next attempt has two version with a black text and white text variants. This version had a close up of the headphones covering the left side of the board, which creates a large focal point for customers to look at. The customers eyes will then track to the right to read the relevant information, which I’ve applied a size hierarchy to which means that their eyes will follow down and smoothly intake all of the information that’s been displayed.
However I came to the conclusion that this display board isn’t effective as it’s created in portrait rather than landscape, which makes it more reminiscent of a poster than a display board. This led me to experiment in a horizontal design inside of photoshop instead.

This design did not work due to many reasons. It is too busy with the headphones covering the edges and large text in the centre, despite this causing a focal point in the centre with the help of the dark grey to light grey gradient, the text being the same size means that it loses it’s value. This error has led me to try again once more in a landscape design.
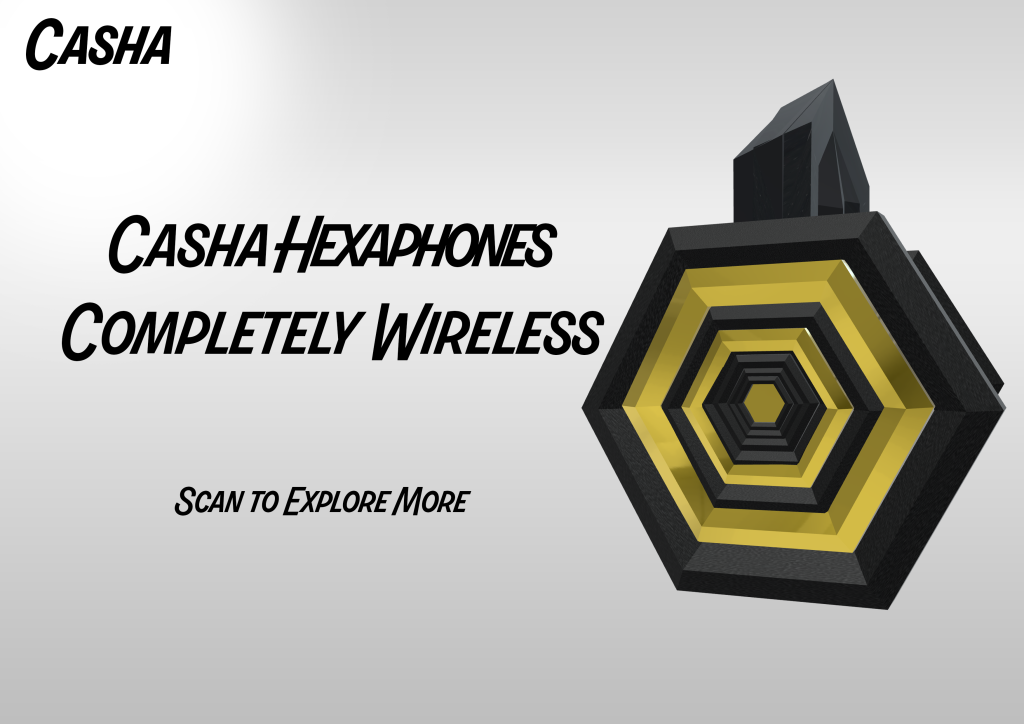
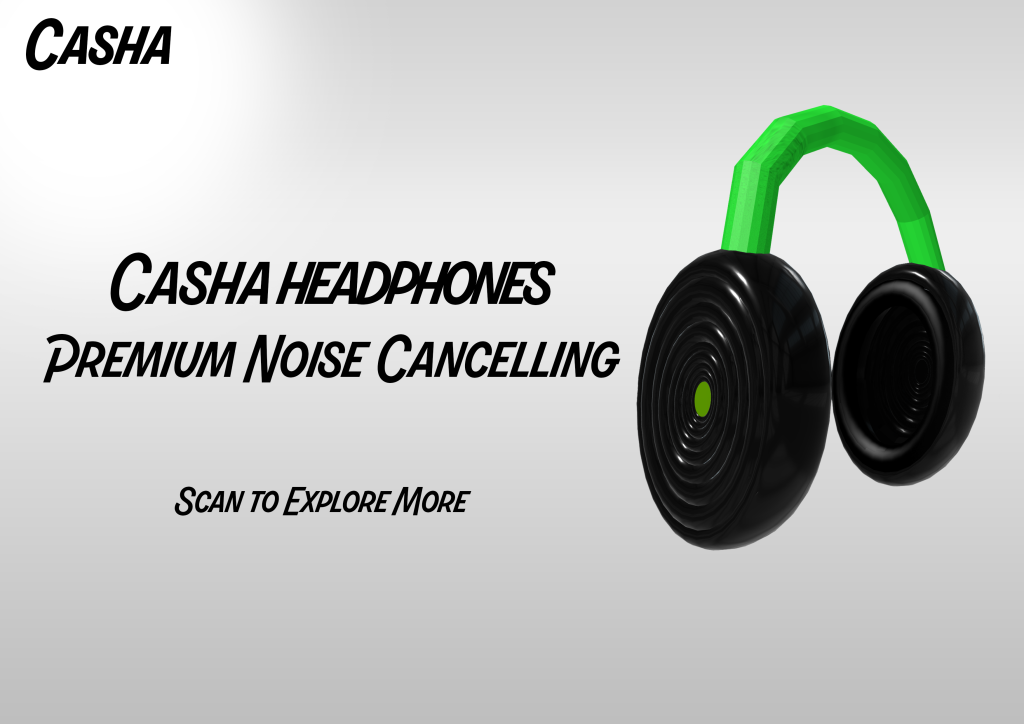
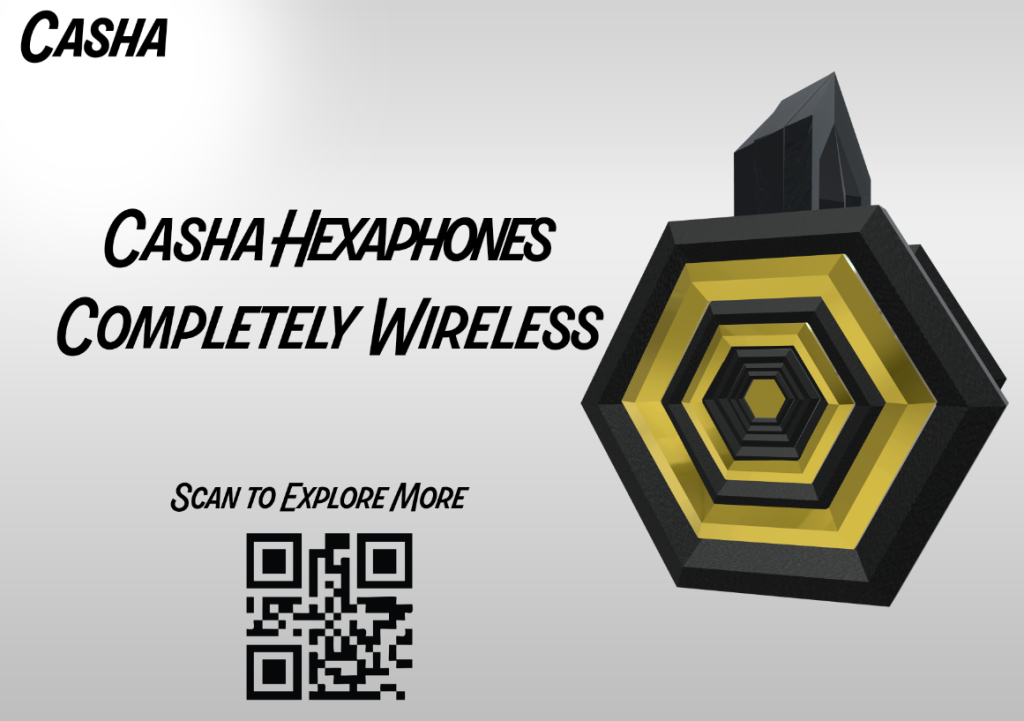
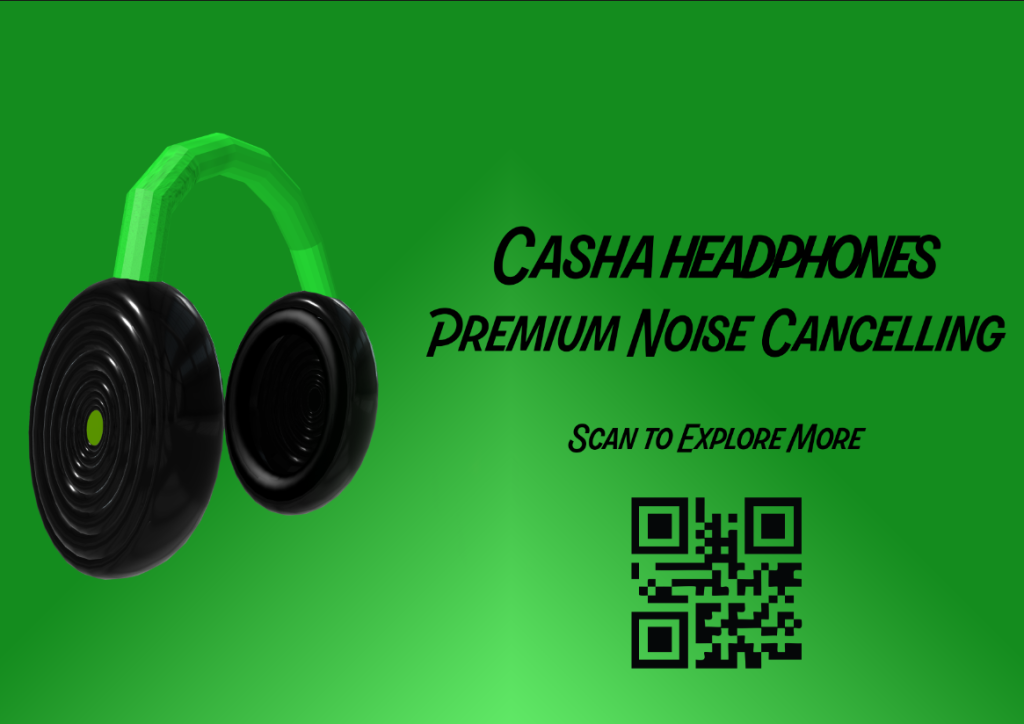
Here are my two final designs for my created display boards, these two designs feature the two different headphones models that I have created and photographed inside of Gravity Sketch. They show off the model on the right hand side with promotional information on the left hand side using a hierarchy to make sure the name of the headphones and their features are most eye-catching. These will be featured in store with a QR code to scan and means that the poser will be able to clearly show the 3D model of the headphones through the use of 8thwall.
8thwall (500 Words)
The final stage of this project was to transport everything I made inside of Gravity Sketch in VR and my posters from Photoshop and upload them to 8thwall to create Image Targets. This meant that I had to export my 3D models in GLB as this is the file type that is compatible inside of 8thwall. I started by creating a brand new file and removing the default cube, the next step in the process was to add the GLB files into the asset section, this will allow me to grab the assets when I am ready to. Next I uploaded an Image Target, this is the object that will be scanned with a camera and activate the model coming in front of it once it’s been scanned.
After this I put the models underneath their corresponding Image Targets, making them class as a “child” of the image target. This means that when the Image Target is scanned the “child” will show up wherever it is positioned inside the studio, as this would be scanned inside of a store I kept the models close to the display boards. This was also to prevent users from getting confused if they model was further away or off screen and could cause the user to think the image target is malfunctioning.
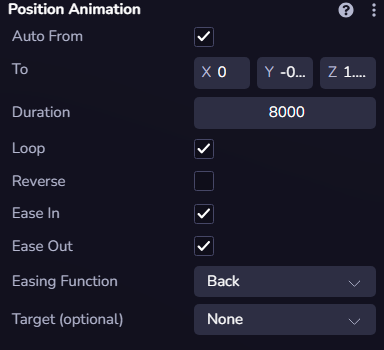
I then applied a position animation that is looped and moves the model slightly down, this loop causes the animation to look as if it’s hovering up and down in the air. This makes the process of scanning the display and looking at the model more engaging than a static model therefore creating more engagement from the user which is beneficial to the storeowners that implemented this new type of advertisement but also for the consumer as they get to see their headphones properly. The animation is visible in the YouTube animation below.
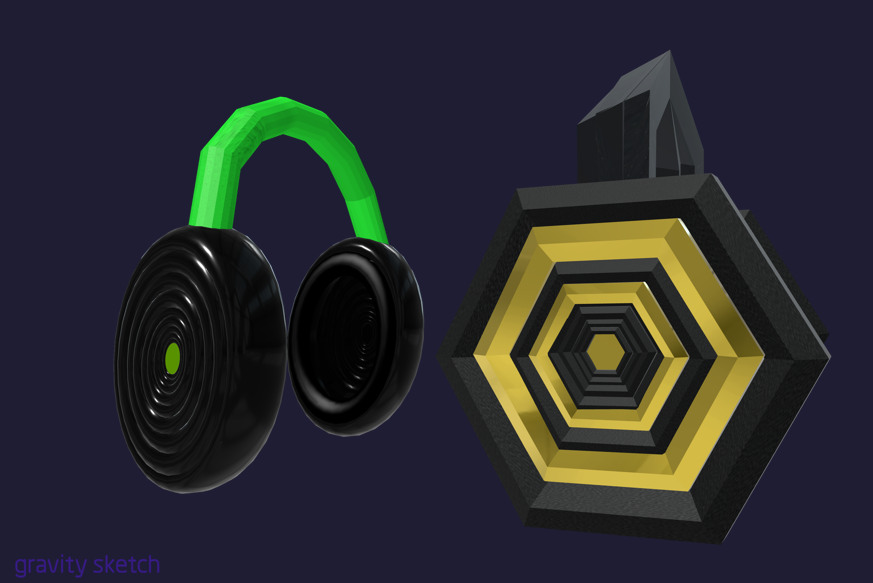
I then repeated this same process for the second set of headphones which are green and black themed. I created two versions of the same headphones, this was to further expand my Gravity Sketch skills but also 8thwall skills. Below is the QR Code to activate the display.
However upon completing my final display I’ve realised that my second image target also activates the first, this is due to both of my image targets being too similar to each other, I confirmed this theory as the Final Display with the QR code hasn’t been linked but still shows the model pop up. This means that 8thwall has an issue with image targets that look too similar to each other as they end up activating the wrong asset. I proceeded to fix this by creating a vastly different advertisement that includes audio when the image target is activated.
I overcame the issue of the image targets getting recognised as a singular target but creating a vastly different second one. I also uploaded audio, at first I attempted to add component then audio component however this didn’t work. To fix this I used the mp3 in my assets and made it a child of the image target. This enabled audio to play once the screen is tapped.
Final Thoughts
This project showcases how Augmented Reality can be used to promote products in store or in public spaces in ways that aren’t mainstream and I believe that my project showcases this, it also shows how various methods of creating work can be put together by creatives from various sources.